Showing posts with label Battle Reports. Show all posts

Monday, April 1, 2019

Warmachine Tournament Report, March 31

Final game, early days
After a bit of a dry spell, I got three games in Sunday at Rune & Board in a local steamroller tournament. I went 0-3, but it's just as well; I was testing out a bunch of new tech cold, so it was definitely an opportunity to learn instead of strive for victory.

I brought two lists, as per usual, but only played one:

Bump in the Night theme force
King of Nothing
2x Crabbits
2x Clockatrices
Gorehound
2x Hollowmen (max) + Lantern Man
2x Mad Caps
2x Neigh Slayers (max)
Eilish Garrity
Glimmer Imp
Lord Longfellow

Bump In the Night hasn't been a very popular theme force for good reason, because the Grymkin infantry are fairly lackluster and the theme doesn't do much to improve them. Still, the Clockatrice makes a difference, and some new models coming out this month ought to make them tick a little better. So I thought I'd try it.

For the first round, I faced off against Danny, one of the best players in the area, playing Retribution of Scyrah. He dropped a Garryth 2 list with a bunch of mage hunters. I forget the scenario, but it was one where he was able to push in and win on scenario while I scrambled to figure out what all my stuff did... Highlights of this match up were finding out that the King's cloud wall is, in fact, remarkably effective if used carefully, even against lists that pack LOS-ignoring tech. Also, Mad Caps are fun but seem tricky to use well.

Second round was against Kyle, to whom I had just sold a Slayer warjack. He promptly used against me in a classic Asphyxious 3 'jack spam list. Curses! I'd never faced this list archetype before and it was interesting. Cloud wall again really slowed down his alpha, and a plethora of low-value targets gave his high-value attacks less, um, value. However, I wasn't able to take down as many 'jacks as I needed on my first turn of attacking - missed a few attack rolls - and since I'd put King way out there, he was able to snag an easy assassination.

Third round was against Berks' accursed Kaelyssa Forges of War list, with that stupidly powerful Dawnguard Trident and the Dawnguard Destors. (It's the matchup in the picture.) I actually did somewhat better than I expected in this one, but clocked out nonetheless. The key mistake I made here were that I counter deployed my Neigh Slayers to take on his Trident, and they can't really handle it it. The key point is that it both outthreats them (17" without a charge compared to 9.5") and has enough firepower to fairly reliably kill 4-5 of them a turn. In the end, I ran out of time trying to clear a zone to just score points. It's possible that I might have been able to grind it out scenario, but I think the Trident would have swung it in Berks' favor on attrition or even assassination - especially after he eliminated one of my Clockatrices. I think I'm going to have to start bringing Old Witch 3 just to counter the Ret ranged game that I keep seeing at these things...

Over all, good games and a good event. Props to James for running it.

Tuesday, January 15, 2019

Warmachine Tournament 2019-01-13

Portland Game Store has the happy habit of running a monthly Steamroller on a Sunday, which means a lot of people who can't make Saturdays due to work or whatever can still get a game in. This past Sunday saw six players competing for top place - a small turnout, but a good three games for me. (Well, sort of. I did lose every game.)

I brought Grymkin for my list pair:

Grymkin Army - 75 / 75 points
[Theme] Dark Menagerie

[Wanderer 1] The Wanderer [+28]
 - Cage Rager [14]
 - Cage Rager [14]
 - Crabbit [0(-)]
 - Crabbits (2) [7]
 - Gorehound [6]
 - Skin & Moans [15]
 - Skin & Moans [15]
 - Skin & Moans [15]
Gremlin Swarm [0(3)]
Lady Karianna Rose [4]
Death Knell [13]

Grymkin Army - 75 / 75 points
[Theme] Dark Menagerie

[Old Witch 3] Zevanna Agha, the Fate Keeper [+27]
 - Cage Rager [14]
 - Cage Rager [14]
 - Crabbit [0(-)]
 - Crabbit [0(-)]
 - Crabbit [0(-)]
 - Crabbit [0(-)]
 - Frightmare [9]
 - Frightmare [9]
 - Skin & Moans [15]
Gremlin Swarm [3]
Gremlin Swarm [3]
Gremlin Swarm [3]
Gremlin Swarm [3]
Lady Karianna Rose [4]
Dread Rots (max) [12]
Death Knell [13]

(For the non-Warmachine players reading this blog: The Grymkin are a literal army of nightmares from hell invading a steampunk fantasy world. Hence the goofy aesthetic to their models and names.)

Round 1: Old Witch 3 vs. Issyria

First I faced Michael and his brand new Dawnmowers Dawnguard Tridents.

Retribution Army - 75 / 75 points
[Theme] Forges of War

[Issyria 1] Issyria, Sibyl of Dawn [+29]
 - Discordia [18]
 - Hemera [16]
 - Hyperion [32]
Arcanist Mechanik [2]
House Shyeel Arcanists [0(7)]
Dawnguard Trident [16]

Into this I dropped Old Witch 3. Scenario was Invasion. I won the roll and opted to go first, with Michael picking sides.

This was my first game with this list; also my first game with Old Witch, Frightmares, and Lady Rose... It went about as well as I expected. Windwall was money versus all that Retribution shooting, but even so Michael was able to do a lot of work. My Dread Rots were all but useless; I should have kept one back out of range so that I could Old Witch's recursion ability instead of just losing the whole unit to a well-placed consume shot from Hyperion. The Frightmares were likewise useless, but that's definitely a matchup problem. They had no decent targets here.

Fun game, though.

End of round 1

Grymkin spread out to get around the forest...

But the Dawnguard Tridents get some serious work done. All Dread Rots and one of the Frightmares gone, and all the Gremlin Swarms as well.

I'm able to take out the left Trident and Discordia, but... instead of hitting Hemera (center) with Scourge to stop Admonition, I should have put up Windwall again.


End of game - I'm out of time. Tried to kill the Hyperion just for the points, but couldn't close it out. Did kill Hemera, at least. Victory to Michael!

Round 2: Wanderer vs. High Reclaimer


Protectorate Army - 75 / 75 points
[Theme] Exemplar Interdiction

[High Reclaimer 1] The High Reclaimer [+32]
 - Judicator [34]
 - Hierophant [0(3)]
Exemplar Errant Seneschal [3]
Scrutator Potentate Severius [0(6)]
 - Dervish [7]
Wrack [1]
Choir of Menoth (min) [4]
Exemplar Errants (max) [16]
 - Exemplar Errant Officer & Standard [0(4)]
Exemplar Vengers (max) [20]
Knights Exemplar [9]
 - Knights Exemplar Officer [4]
Visgoth Juviah Rhoven & Honor Guard [9]

I picked Wanderer for some variety, won the roll and went first; scenario was Standoff. 

Dennis is quite a good player, and this list has lots of Hand of Fate going on, so I wasn't expecting a victory or even an easy fight. But it turns out Star Crossed goes a long way... if not long enough.

I had a couple bad turns of luck, and made a crucial mistake that cost me the game, or at least more control points/army points. First, my flanking Gorehound failed to kill a Venger and then sprint into his backfield to disrupt things. Second, he got some crazy hot dice and wiped a Skin and Moans off the table with much less effort than expected (even under Star Crossed). Finally, I got so fixated on killing the Judicator that I forgot to cast Star Crossed on the final turn of the game, and left my beasts so full on fury that all the remaining heavies frenzied.

After my first turn, Dennis just getting going.

Second round begins. Sad Gorehound on the left didn't manage to kill a Venger and then sprint into Dennis' backfield.

Third round... Dennis scored three points to my one here.

Fourth round. At least I blew up that Judicator. As can be seen by all the fury tokens on the table, this is where I made my crucial mistake: I forgot to cast Star Crossed, and I left too much fury on the table to leach it off my heavies...

And here's the consequence. The blue Cage Rager on the left frenzied and destroyed the nearest target (an Examplar of some sort) instead of going for an assassination on the High Reclaimer. Also, of course, no Star Crossed.

Dennis lining up to clear some zones.

End of game, with three out of four zones controlled by Dennis. He won, 7 CP to 2.

Round 3: Old Witch 3 vs. Child

Grymkin Army - 73 / 75 points
[Theme] Dark Menagerie

[Child 1] The Child [+29]
 - Cage Rager [14]
 - Cage Rager [14]
 - Crabbit [0(-)]
 - Crabbit [0(-)]
 - Crabbit [0(-)]
 - Gorehound [6]
 - Rattler [8]
 - Skin & Moans [15]
 - Skin & Moans [15]
Glimmer Imp [4]
Gremlin Swarm [0(3)]
Gremlin Swarm [3]
Gremlin Swarm [3]
Gremlin Swarm [3]
Lady Karianna Rose [4]
Death Knell [13]

Remy's a newer Grymkin player who's making do with a limited model selection. But he's certainly getting the hang of using Child to good effect...

I dropped Old Witch again, just to get more playtime with her. Scenario was the Pit II ("Championship Belt"). Remy won the roll and chose to go first; I picked sides (and in retrospect, picked the wrong side...)

My crucial mistakes here were being way too cautious around his Arcana (also, should have dropped Wanderer again) and then going on tilt after he jammed me up with a Gorehound under Discord and a Gremlin Swarm base-to-base with Old Witch. It took me a good thirty minutes to clear them off, and in so doing I left a clear charge lane to my caster. He took advantage of it and neatly closed out the game with a proper assassination.

I should have played more aggressively, worried a bit less about Arcana, and not left my caster so terrible vulnerable. But it was a good game regardless, and I learned a new trick (Gremlin Swarms are very unkind to battle engine casters).

Deployed and ready to go.

Second round begins.

Third round begins. Note the jamming Gorehound and the Gremlin Swarm directly in front of the Old Witch.


End of my last turn - I have finally cleared out the Discord Gorehound and the Gremlin Swarm, but it took far too long. Notice how little has changed between this picture and the last one...

End of game. Lower right corner shows Remy's Cage Rager right up in Old Witch's face, having easily dispatched her.

Sunday, April 1, 2018

2018 Ticket Takedown Tournament Report

March 31st saw the fourth annual Ticket Takedown - a local Warmachine tournament where first prize is a ticket to Lock & Load up in Bellevue. Happily, I was able to attend for my first tournament in a few months. I brought the following Grymkin lists; not the most competitive, I think, but the easiest for me to play with little practice.

The Child, Heavy Heavy

Grymkin Army - 75 / 75 points
[Theme] Dark Menagerie

(Child 1) The Child [+29]
 - Cage Rager [14]
 - Crabbit [0(n/a)]
 - Crabbit [0(n/a)]
 - Gorehound [6]
 - Rattler [8]
 - Skin & Moans [15]
 - Skin & Moans [15]
 - Skin & Moans [15]
Glimmer Imp [4]
Gremlin Swarm [0(3)]
Gremlin Swarm [3]
Lady Karianna Rose [4]
Dread Rots (min) [7]
Death Knell [13]


Grymkin Army - 74 / 75 points
[Theme] Dark Menagerie

(Heretic 1) The Heretic [+28]
 - Cage Rager [14]
 - Crabbit [0(n/a)]
 - Crabbit [0(n/a)]
 - Crabbits (2) [7]
 - Frightmare [9]
 - Frightmare [9]
 - Frightmare [9]
 - Rattler [8]
 - Rattler [8]
Glimmer Imp [4]
Glimmer Imp [4]
Gremlin Swarm [0(3)]
Gremlin Swarm [3]
Gremlin Swarm [3]
Lady Karianna Rose [4]
Dread Rots (min) [7]
Death Knell [13]

The Child list focused on having as many heavies as I could field, backed up by the Child herself for a hard-hitting beast brick. The Heretic list, on the other hand, fielded a passel of lights (plus the Cage Rager to kind of anchor the list), just because I wanted to see if that was a valid strategy. (It might be? Not sure yet.)

The event went to four rounds, and I had a perfect record: 0 wins, 4 losses. Which is ok, because at this point in my Warmachine career, I'm just happy to get in a full day's gaming! Plus, I lost on clock each round instead of getting my caster assassinated or losing on scenario points. If some of those games had not been timed, I think I had a good chance at winning, so all I need to do is, well, learn what my units can do...

First round I played the Child against what felt like a brutal Cygnar list:


Cygnar Army - 75 / 75 points
[Theme] Storm Division

(Stryker 2) Lord Commander Stryker [+28]
 - Stormwall [39]
Captain Arlan Strangewayes [4]
Major Katherine Laddermore [8]
Savio Montero Acosta [0(6)]
Stormsmith Stormcaller (3) [0(5)]
Storm Lances (max) [20]
Stormblade Infantry [10]
 - Stormblade Infantry Officer & Standard [0(5)]
 - Stormblade Infantry Storm Gunner (2) [4]
Storm Strider [18]

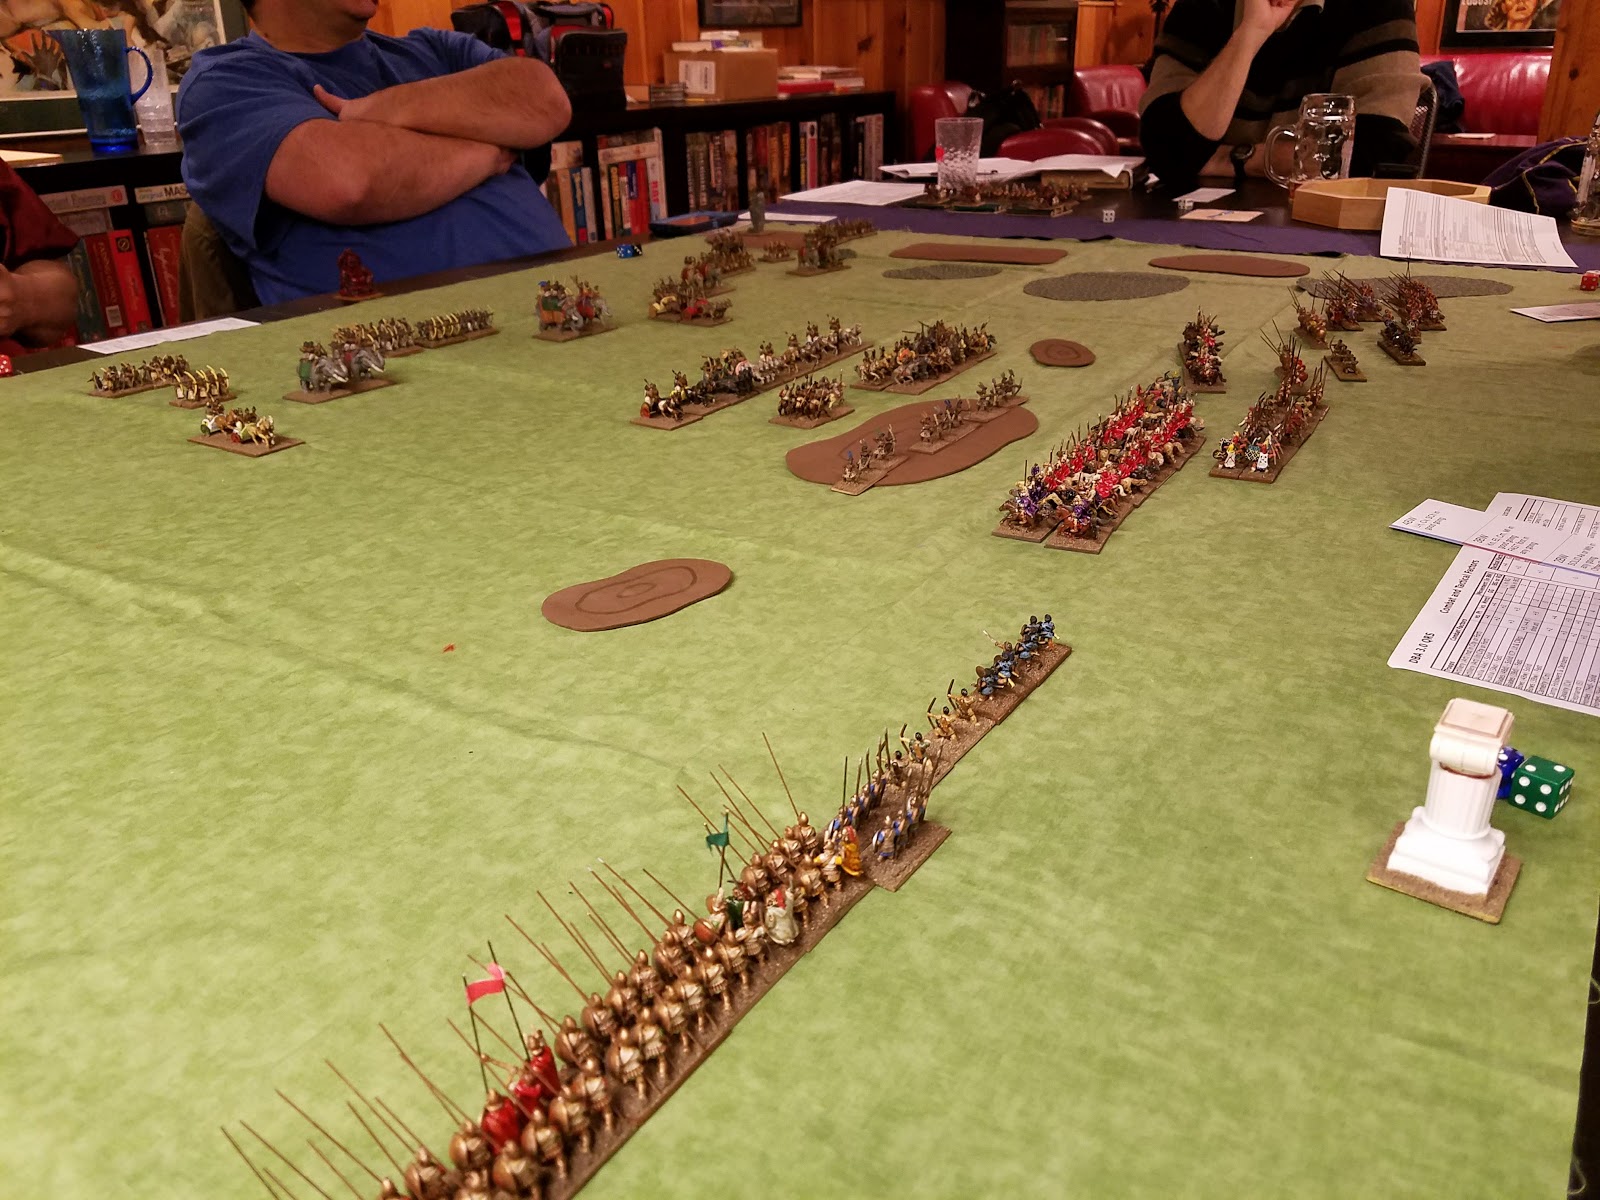
This is the first time I've played the Child (IIRC), and it was a pretty rough game in a lot of ways; I was able to eventually clear the right hand circle zone and score some points there, but the left hand zone remained contested for the entire game even, as above, after I killed off all the Storm Lances. The Stormwall was going to be an intractable problem for the entire game, I think. Regardless, I spent so much time looking up my model abilities and trying to figure out what to do that I ran out of time when my opponent had a good 20 minutes left on his clock. (This is a recurring theme at the event.)

Second round was Child versus a Khador warjack spam list:


Khador Army - 74 / 75 points
[Theme] Jaws of the Wolf

(Karchev 1) Karchev the Terrible [+30]
 - Destroyer [14]
 - Destroyer [14]
 - Juggernaut [12]
 - Juggernaut [12]
 - Marauder [10]
 - Marauder [10]
Greylord Forge Seer [0(4)]
 - Destroyer [14]
Greylord Forge Seer [0(4)]
Yuri the Axe [0(6)]
Kayazy Eliminators [5]
Widowmaker Scouts [8]

(I've probably missed a few things in that list.)


When the game started, I was pretty sure I wouldn't be able to deal with all that metal. Turns out that may have been an unfounded fear, as a loaded Skin & Moans makes pretty short work of a Khador heavy. My favorite trick of the match was running the Gorehound with Discord on it (so no orders or spells near the beast) around near Karchev and his Forge Seers, then knocking Karchev down with a Force Hammered Juggernaut. My opponent took a good 20 minutes trying to unpack that particular order of operations puzzle, and in the end did not manage to kill the Gorehound. Again, this game went to time, with my opponent having around 15 minutes left. (I felt like a bit of an idiot on missing out on some easy points on my flag, though.)

Third round was a Grymkin mirror match; I dropped the Heretic list into the King of Nothing:


Grymkin Army - 74 / 75 points
[Theme] Dark Menagerie

(King of Nothing 1) The King of Nothing [+28]
 - Cage Rager [14]
 - Crabbit [0(n/a)]
 - Crabbit [0(n/a)]
 - Crabbits (2) [7]
 - Skin & Moans [15]
 - Skin & Moans [15]
Gremlin Swarm [0(3)]
Gremlin Swarm [3]
Gremlin Swarm [3]
Lady Karianna Rose [4]
Dread Rots (min) [7]
Twilight Sisters [7]
Death Knell [13]

(again, think I missed a few things on here)

No photo, sadly. I'm afraid this is the match I remember least. Not sure why. My opponent marched forward and cast a bunch of Ashen Clouds to block line of sight to his front line; I countered by shooting it up with the Frightmares, who can ignore clouds. I think that early attrition threw him off his game a bit, but he recovered nicely and kept me from making real progress until, as usual, I ran out of time.

The fourth and final round was against Trollbloods, and my opponent dropped the new hotness, Borka 2.


Trollbloods Army - 75 / 75 points
[Theme] The Power of Dhunia

(Borka 2) Borka, Vengeance of the Rimeshaws [+27]
 - Earthborn Dire Troll [14]
 - Earthborn Dire Troll [14]
 - Mulg the Ancient [22]
 - Rok [19]
 - Storm Troll [9]
 - Troll Axer [10]
Troll Whelps [0(4)]
Troll Whelps [0(4)]
Krielstone Bearer & Stone Scribes (min) [6]
 - Stone Scribe Elder [3]
Lynus Wesselbaum & Edrea Lloryrr [5]

Some players may recognize this list as the one that Tim Banky took second at Adepticon Champions with. I did not, but I was pretty sure I was going to have trouble with it. I put the Child on the table, since I didn't think the Heretic's passel of lights could deal with that much Troll meat.

This was a much closer game than the others; I clocked out with my opponent having 1:48 on her clock, so I feel a bit better about my clock management this game. I was able to use a building on my side of the table to keep my caster pretty much completely safe from assassination, but I felt too threatened by his beast brick to run in and cause trouble. As it turned out, I was able to kill all the heavies, though it took most of the game and cost me a Skin & Moans. (Borka's feat was a brutal little time walk for me to deal with.) My opponent was also clearly more experienced against Grymkin than I am with them, and did a very careful job of playing around my Arcana choices.

It was nice to put some Hordes figures back on the table. I'm looking forward to getting more games in this spring, time allowing.

Congrats to Chad and Rune & Board for running a successful tournament, and to Aaron Allen for taking first place. (Side note: The tournament was held at Out of This World Pizza, one of those pizza joints that also has private dining rooms for birthday parties, a huge indoor play area, and the like. It was in fact a very good venue; food on site at a reasonable price and a large room that easily fit the 18 players with plenty of room to spare.)

Sunday, January 29, 2017

Battle Report: Battle of the Hydaspes River

Dave put on a version of the Battle of the Hydaspes River, Alexander the Great's last great battle, last night. He used DBA 3.0, with a few variations - no rolling for command pips was the biggest one. It ended ahistorically with an Indian victory, which is a pity as I played the left flank for the Macedonians.

Indian chariots and skirmishers dominate the battlefield to begin with...

Alexander's forces march on to the table.

The phalanx on the left flank. Two units of companions are shifting from the left to the center behind the phalanx line.

Alexander (the purple-caped cavalry) and his Companions bullying the Indian skirmishers off the hill.

Indian elephants lumbering toward the Macedonian left flank.

The Indian front line retreats from the Companions, but their main line approaches...

Indian skirmishers move through rough going, covering their elephants.

Treetop view of the battle from the Macedonian left. The left phalanx is shifting a bit to avoid being outflanked by the elephants. The Indian front line is bowing away from the Companions.

Indian front line is (mostly) driven off by the Companions. 

The elephants finally hit the Macedonian left flank, smashing into the skirmishers guarding the far left.

Indian line reforms and prepares for the second clash of arms.

Elephants drive the skirmishers back a bit...

... and have destroyed two stands. The phalanx will soon be outflanked. Also, this is when I realized that my phalanx was advancing on archers, not spearmen. Stupid straight bows...

Cavalry smashes into the spearmen, phalanx endures a rather ineffective volley of arrows, and the elephants move around to the rear of the phalanx.

Companions face off against the second line of infantry and elephants.

Overview of the unfolding disaster on the left flank. Note the lack of Macedonian skirmishers.

Overview near the end. In the far distance, the Macedonian reinforcements have crossed the Hydaspes and threaten the Indian left... but too late.


The end, at least as far the left flank is concerned - demoralized and fleeing past the elephants.


Monday, March 14, 2016

Battle Report: Battle of the Brandywine - Howe's Flanking Maneuver

Another Saturday, another historical game. This time it's 1777, and General George Washington has prepared to give battle to General Sir William Howe at the Brandywine Creek in Pennsylvania. But Howe has outmaneuvered the rebels, and sent a column under General Cornwallis on a forced march to crush the Patriot right flank. Washington sends General Sullivan to delay them, and that's where our game begins.

Deployment - from the Birmingham Meetinghouse. Patriots on the left, British in the distance.
Alyssa, Andy, and Jack took the part of the British, while Jeff and I took up the Patriot banner - Dave joined us a bit late, but took the Patriot center when he arrived. On the Patriot side we had Major General John Sullivan in overall command, with William Alexander, Lord Stirling and Adam Stephen under him for the battle. At the game's start, Sullivan's brigade is on the left (except for a single regiment stuck in the far right after fighting a holding action and just now arriving on the field), Stephen has the center and the only artillery, and Stirling is to the right, near the meetinghouse.

The King's forces, commanded by General Sir William Howe, outnumbered the rebels by a fair bit. I'm afraid the only subcommander I can recall is Cornwallis - Wikipedia has the rest, but I don't remember how many of them were represented on the table tonight. They were mostly drawn up on the hill opposite the rebels, with a screen of light infantry and jaegers in front. They also had a single cavalry unit, the 16th Light Dragoons.

To win, the British had to either destroy the Patriots, or cut off their retreat by taking the road that led to the Patriot rear and the rest of Washington's army. They had to do so within nine turns. The Patriots won if they prevented this from happening. Despite their preponderance of force, this was actually an uphill struggle for the British...


The British close in on the Patriots; the Patriots shuffle to the right to form a proper line.

16th Light Dragoons pass the meeting house.

Just before first fire - the Patriots are off the hill and the jaegers have already taken shots.
The British plan was quite simple: move up and push the rebels off the hill while the cavalry rode around and cut off the road behind them. The Patriots, in turn, determined to stand at the base of the hill and hold up in the meeting house. Thus, the Patriots began to move to their right while the British advanced, and the dragoons rode like hell through the woods near the meeting house.

Initial action at the courthouse: The patriots have just seen off British light infantry with a volley of musket fire, while the rest of the line is carefully - mostly - falling back onto the hill.
 Patriots got into the courthouse walls just in time to repel the British light infantry. On the Patriot left, the lines exchanged fire at a distance, to small effect on either side - as can be seen below with the white casualty caps on some stands.

As above

A vicious firefight over the meeting house wall routs both the patriots holding it and the British attacking.
 After repelling the light infantry at the meeting house, the Patriots held their fire as a unit of regulars advanced into the woods and formed firing line, then exchanged a volley of fire with them - to such effect that both units lost more than half their men and broke into a rout!

Meanwhile - and sadly not captured in the photos - the dragoons had cleared the woods but, being out of command, failed to do anything useful for a turn or two.

Patriots continue a slow withdrawal. British move up to the meeting house. On the left, the patriot line is pretty well broken, but the British cannot break through with their disordered troops.
 On the Patriot left, the line had fallen back, but the British were unable to capitalize on this due to disorder and slow movement rates.

British moving past the meeting house and around the left of the hill in the background. Patriots still withdrawing in mostly good order.
 Back on the right, the dragoons faced off against a unit of rebel foot - and, in a massive stroke of luck for the rebels, were all but destroyed by a volley. Still, they didn't break, and the one remaining stand attempted to charge the next turn... to no effect. At the same time, the Patriot reinforcements had just arrived on the table and were marching toward the withdrawing lines.

End game. The patriots have successfully held off the British flanking maneuver until nightfall.
 In the end, the Americans withdrew successfully as night fell, while Howe had to be content with merely forcing a retreat instead of rolling up Washington's army.

At the beginning, this felt like a bad position for us Patriots, what with being outnumbered and having the cavalry handily outflanking us. But as the game developed, the British were simply unable to move quickly enough to force the victory conditions. A fun scenario. Thanks to Victor for putting it on!